Getting started with B2blix pigu buybox
This guide explains how to complete the first B2BLIX Pigu BuyBox setup: connect your seller account, prepare your product data, enable marketplace monitoring, test the calculations, and choose how prices will be sent to Pigu.
For a safer first setup, begin with a small group of products. Check the results before applying the same configuration to your complete catalog.
Important: Monitoring, synchronization, price calculation, export, and a live marketplace update are separate steps. A price shown or exported by B2BLIX is not necessarily live until Pigu has accepted and applied it. B2BLIX can improve pricing responsiveness, but it cannot guarantee the BuyBox or sales.
1. Activate the service and connect your pigu account
Create your B2BLIX account, open the Pigu BuyBox service, and select the available Enable or Activate action.
During onboarding, provide:
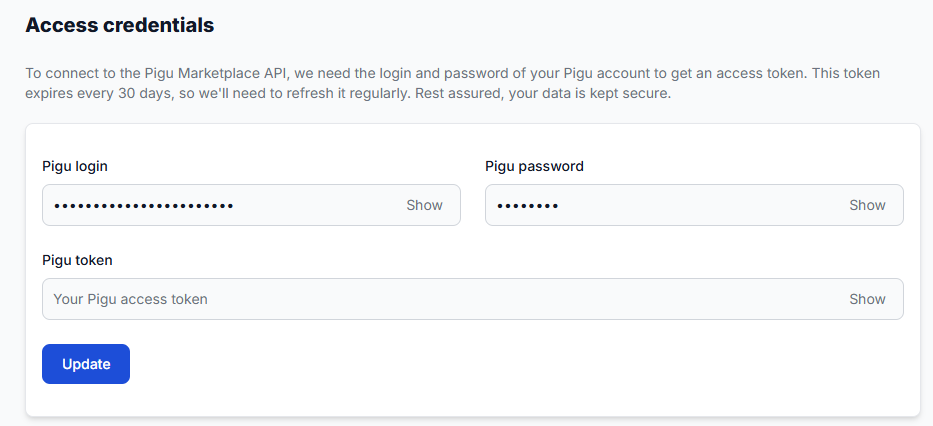
- Your Pigu login and password, or a manually generated Pigu access token.
- Your public shop-profile name for each marketplace where you sell.
- Your soft and hard spending limits.
You can use your Pigu login and password so B2BLIX can renew the required authorization when needed. Alternatively, you can provide a token yourself, but you must replace it when it expires.
To review the saved connection, open Access credentials. For more information, read Access credentials for the Pigu connection.
Your marketplace shop name is the final shop-name part of your public seller-profile URL. Enter it only for marketplaces where you currently sell.
Open Marketplace slugs to check the saved values. For instructions, read Marketplace slugs: add or update your shop profile names.
The soft limit is a warning level. The hard limit can stop new chargeable data collection when the configured threshold is reached. Choose limits that match the maximum monitoring cost you are prepared to accept.
For details about monitoring costs and limits, read How B2BLIX pricing, billing limits, and monthly cost optimization work.
After activation, B2BLIX begins the first product and category discovery process. This may take a few hours.
2. Prepare your product source while categories are being discovered
While you wait for category discovery, prepare a small test product source. B2BLIX supports:
- Google Spreadsheets
- CSV feeds
- XML feeds
- Compatible XML or CSV feeds generated by a PIM or another product system
B2BLIX must be able to open the source URL during synchronization. When using Google Sheets, give view-only access to anyone who has the link. Do not give public edit access.
Each product normally needs:
- A valid EAN
- A current or base price
- Stock or availability information
- Any required marketplace-specific values
- A safe minimum and maximum price range
You can define the price range in either of these ways:
- Provide an explicit MIN and MAX value for each product in your source.
- Provide the standard price and later configure category coefficients that B2BLIX uses to calculate MIN and MAX.
Product-level MIN/MAX values take priority over category coefficients. For the safest control, use product-level values when different products have different costs or margin requirements.
Price safety: Check that MIN is greater than zero, MAX is not lower than MIN, and the normal product price is suitable for the permitted range. Incorrect limits can prevent calculation or allow an unsuitable exported price.
For complete import instructions, read How to set up product import into B2BLIX. For price-limit rules, read How to provide and validate MIN/MAX price limits.
3. Test the product source
Before enabling regular synchronization, open Sync tester.
Use it to:
- Open the example Google Spreadsheet and review the expected structure.
- Check whether B2BLIX can access your source URL.
- Confirm that the product columns or XML elements are recognized.
- Find missing fields, invalid EANs, or incorrectly formatted prices.
- Generate a test result without directly publishing prices to Pigu.
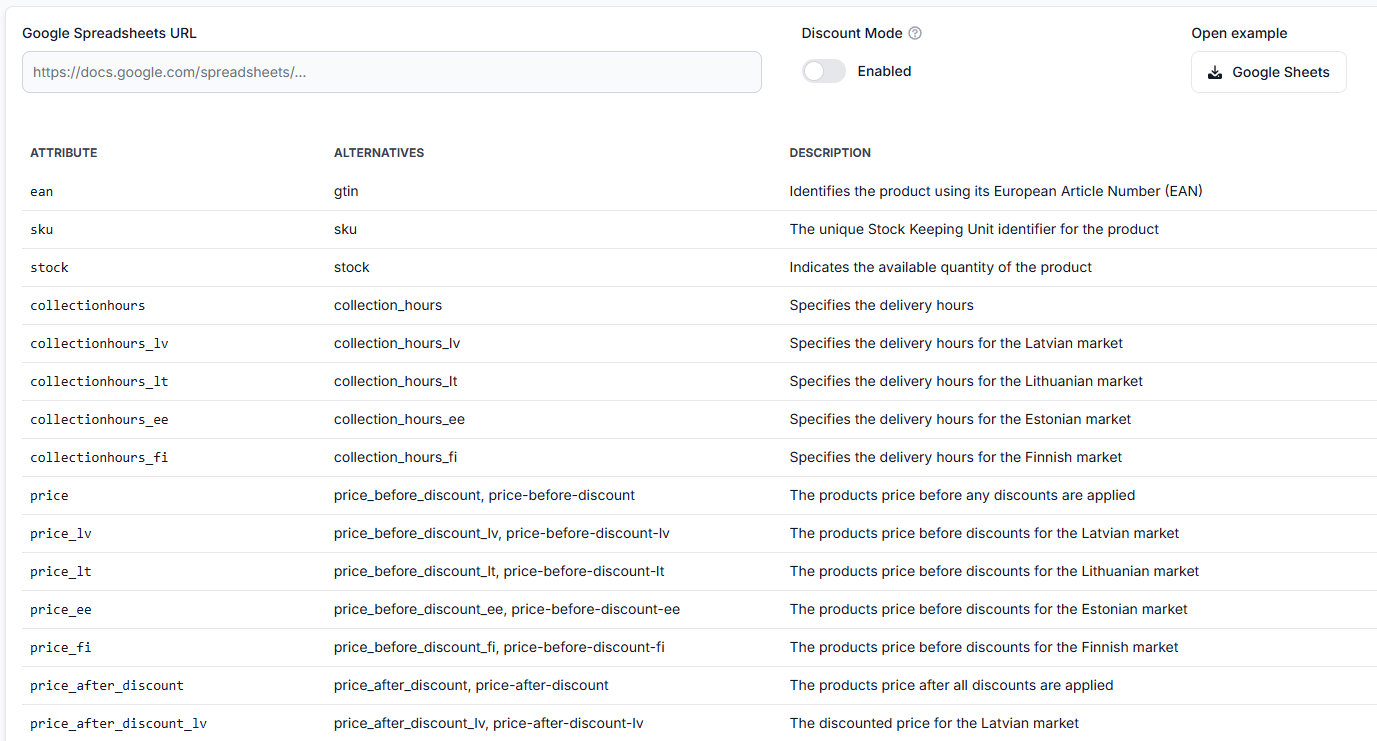
For a detailed explanation, read Sync tester and Google Sheets file structure.
4. Enable monitoring for the discovered categories
After approximately a few hours, open Category management.
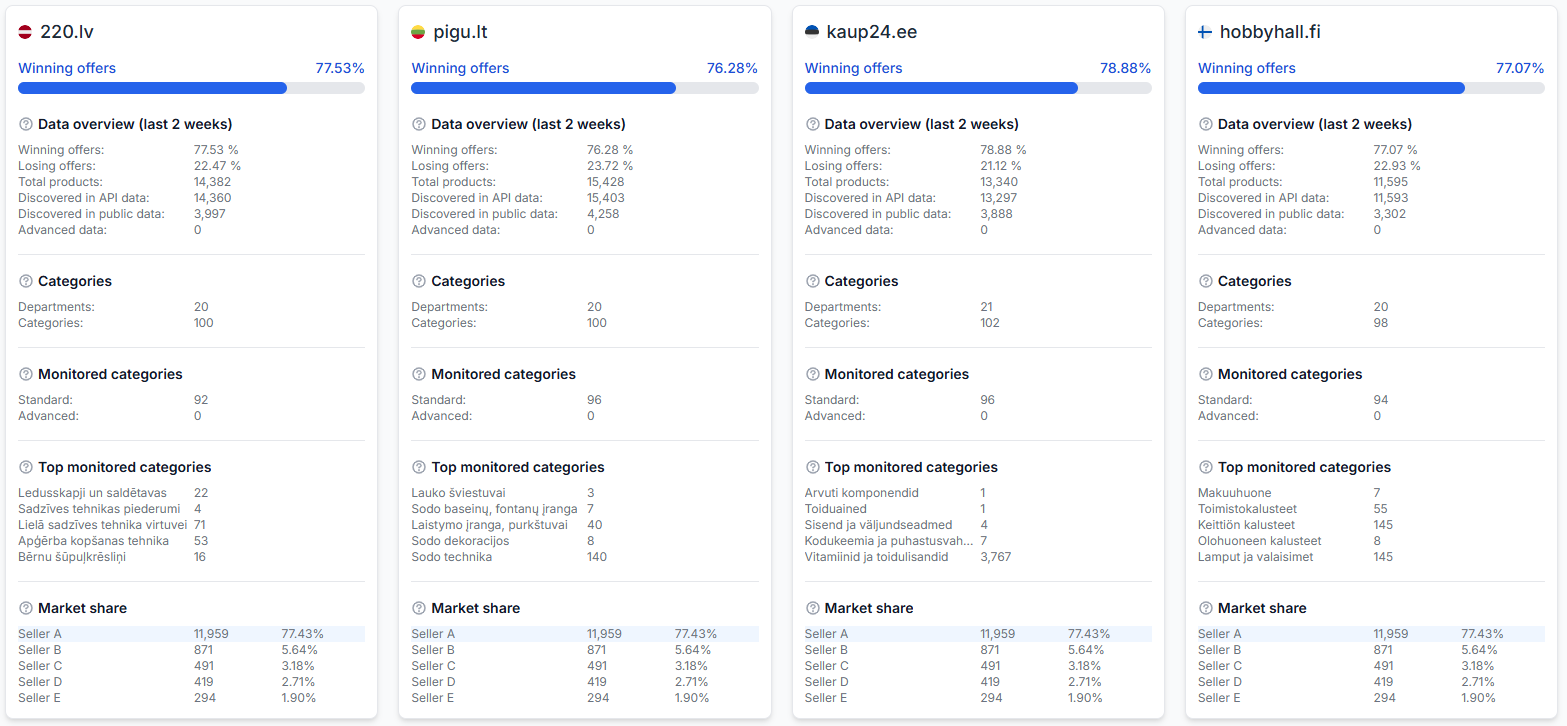
Categories are discovered separately for 220.lv, Pigu.lt, Kaup24.ee, and HobbyHall.fi. Use the marketplace filter and review the categories found for each marketplace.
For every category you want to use:
- Check that the category and displayed product count are correct.
- Set the standard frequency to a value greater than zero.
- Leave irrelevant or unused categories at zero.
- If your source does not contain product-level MIN/MAX values, configure suitable MIN and MAX coefficients.
- Save the changes and confirm that the new values appear in the category table.
A practical starting frequency for many normal categories is approximately every 2–3 hours. Important categories may need hourly monitoring. Slow-moving categories may only need one or two checks per day.
Do not choose the highest frequency for every category. More frequent monitoring provides fresher information but also creates more chargeable usage. For the first setup, use standard monitoring and leave advanced monitoring disabled unless your chosen pricing strategy needs the additional information.
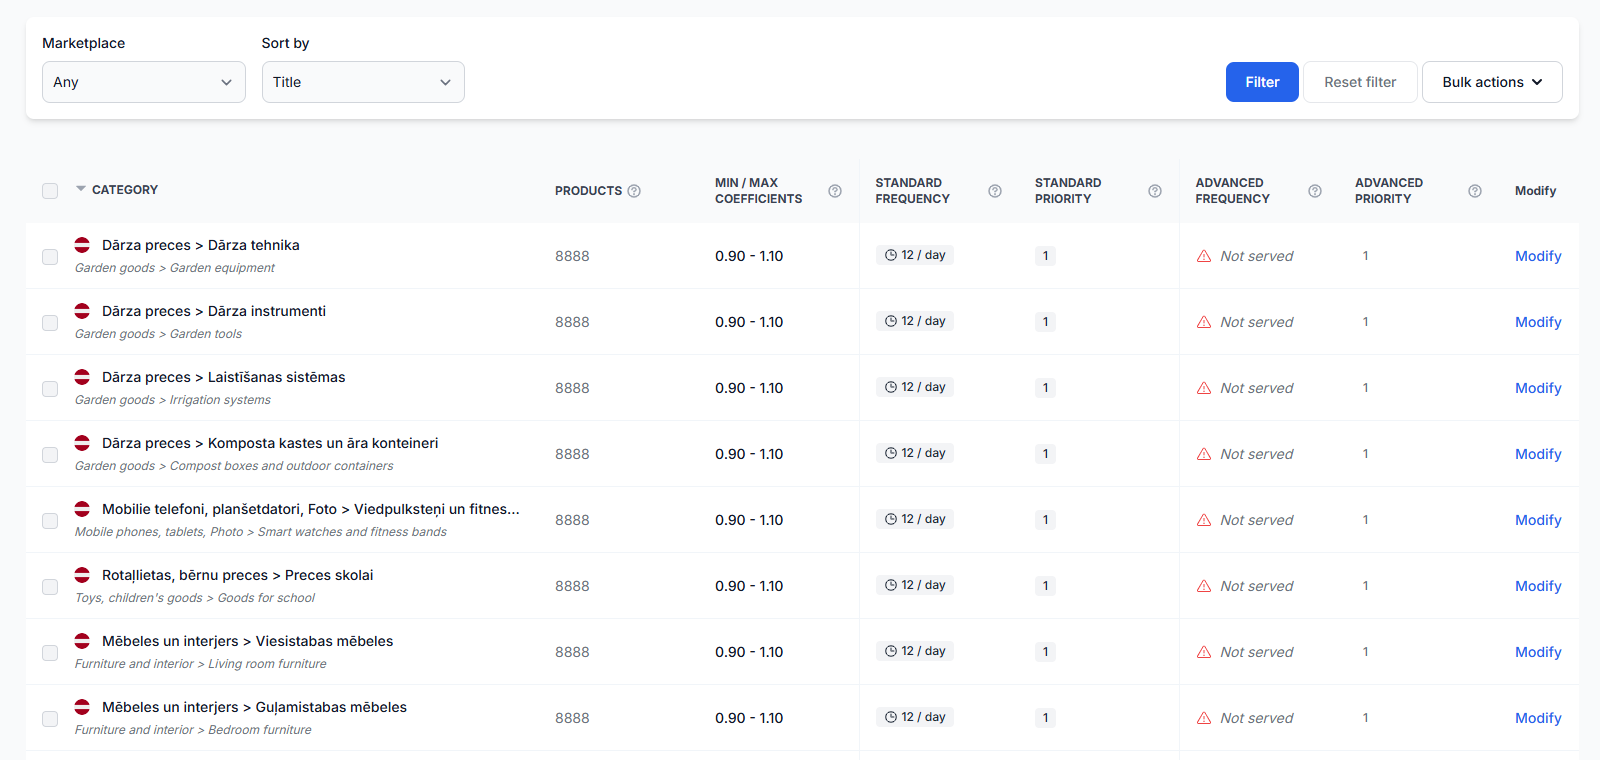
For page instructions, read Category management: monitoring frequencies and price coefficients. For help choosing a frequency, read How to configure category monitoring, frequency, data freshness, and a limited rollout.
5. Configure synchronization and export
Open Sync settings and complete the main settings:
- Enter your product-source URL.
- Select the correct source format: XML, CSV, or Google Spreadsheets.
- Choose how often synchronization should run.
- Select the export method.
- Save the configuration.
The synchronization interval controls how often B2BLIX imports your product source, calculates results, and prepares the selected output. It does not control marketplace monitoring, which is configured separately in category management.
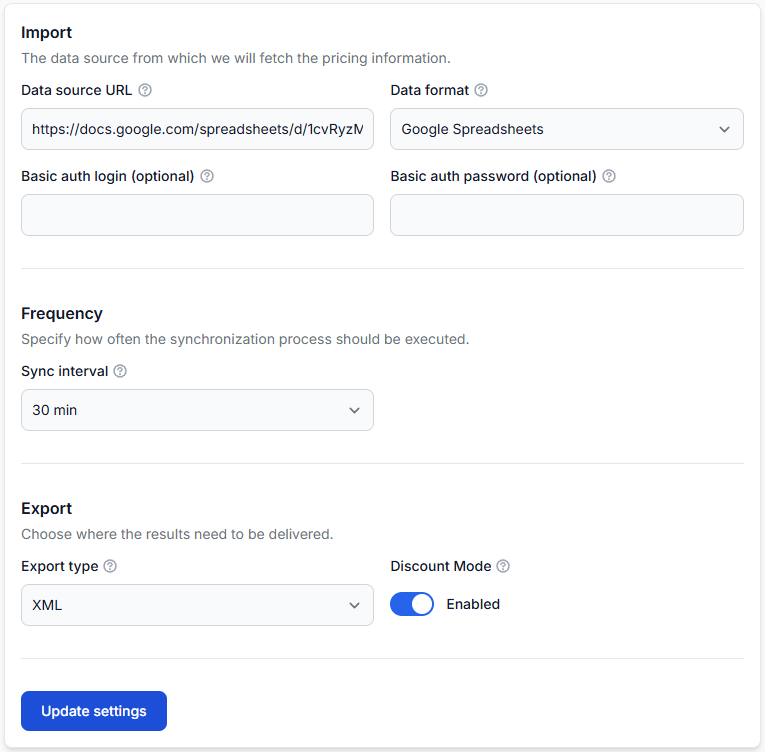
Choose xml or api export
- XML: B2BLIX creates a permanent public XML URL. You must add this URL as a stock and price import source in Pigu. XML is a practical default for many sellers and is recommended for large catalogs.
- API: B2BLIX submits supported updates through the Pigu integration. The marketplace may still need time to process and display them.
- API with stock and collection hours: Use this only when your source contains accurate stock and collection-hour information and you want B2BLIX to submit those values.
For all settings, read Sync settings: configure product import and price export. For help choosing an output, read XML vs API synchronization: which export method should you choose?.
6. Run the first synchronization and check the results
Keep the first product source small. After saving the synchronization settings, use Run sync or wait for the selected interval.
Then complete these checks:
- Open Sync reports and confirm that products were imported, matched, calculated, and prepared for export.
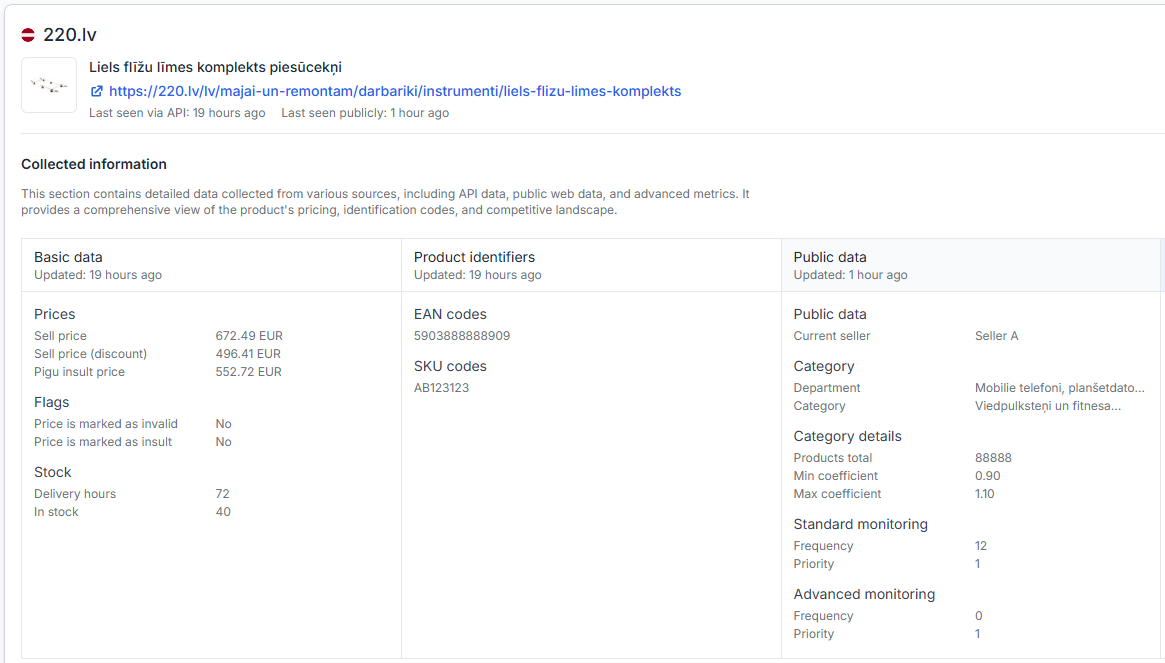
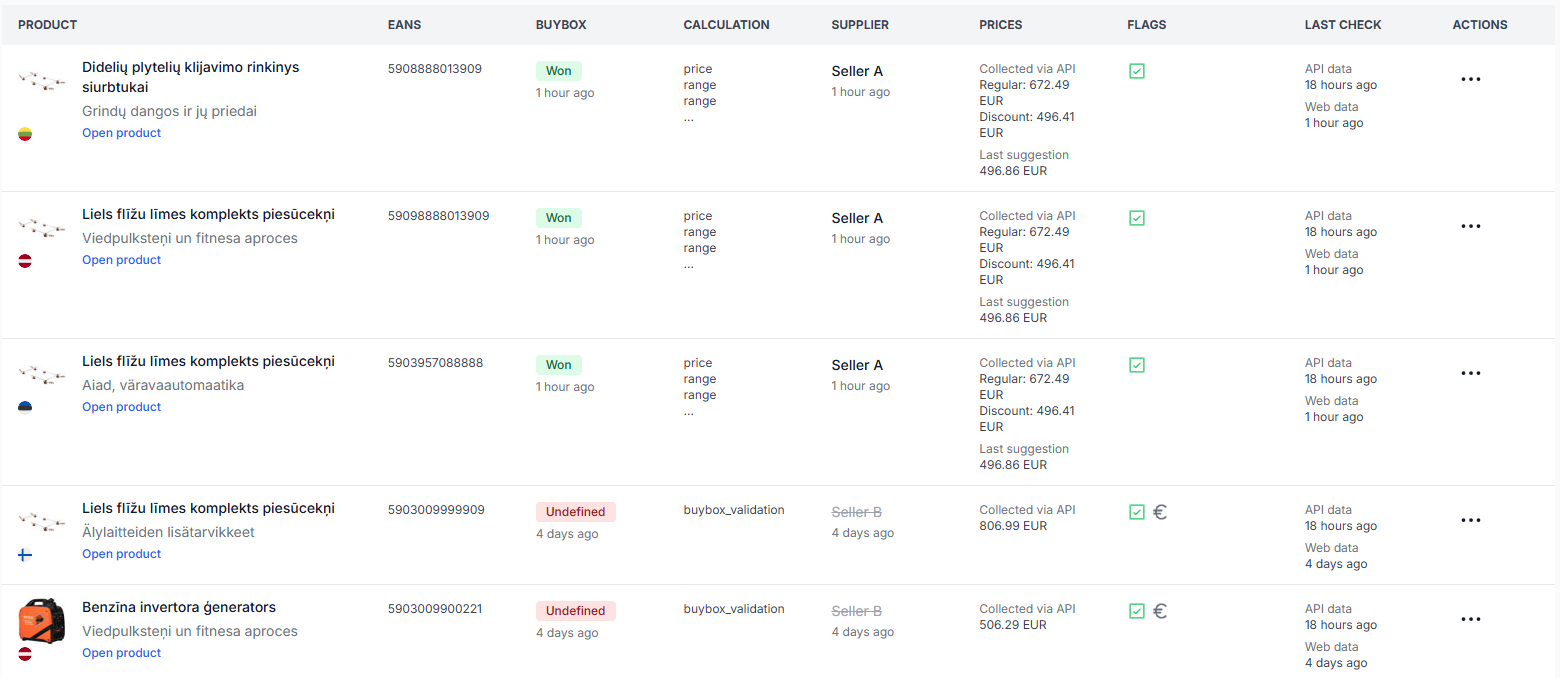
- Open Product checker and inspect several representative EANs.
- Check the imported price, stock, MIN/MAX range, latest marketplace observation, calculated price, and export result.
- If XML is selected, open the public XML URL and confirm that it contains the expected products and reasonable values.
For report details, read Synchronization reports: review import, BuyBox calculation, and export results. For product-level checks, read Product checker: review product data, price calculations, and exports.
Do not continue to a full catalog yet if products are missing, MIN/MAX values are wrong, the XML is empty, or calculated prices do not match your intended pricing rules.
7. Enable price updates in pigu
When using xml
Copy the address shown under Your public URL in Sync settings. Then:
- Log in to your Pigu seller account.
- Open Products.
- Open Import.
- Select Stock and prices import.
- Choose Import source.
- Select HTTPS link.
- Paste the complete B2BLIX public XML URL.
- Review and confirm the field mapping if Pigu requests it.
- Save the import source.
For the complete procedure, read How to connect and use the B2BLIX XML feed in Pigu.
When using api
No separate XML source needs to be added in Pigu. B2BLIX submits supported updates through the configured connection. Review Sync reports and Product checker after the first API run, and allow time for Pigu to process accepted updates.
Final setup checklist
- The Pigu BuyBox service is active.
- Your Pigu credentials or token are valid.
- Your shop slugs are entered for every marketplace where you sell.
- Your soft and hard spending limits are configured.
- Your product source is accessible and passes Sync tester checks.
- Every product has a valid EAN, price, stock value, and safe MIN/MAX range.
- Relevant marketplace categories have a standard monitoring frequency greater than zero.
- The synchronization source, interval, and export method are saved.
- A small test synchronization has completed successfully.
- Representative products have been checked in Product checker.
- The XML feed is connected in Pigu, or API export is enabled.
- Live marketplace values have been checked before expanding to the full catalog.
After the test group works correctly, add more products and categories gradually. Continue to review monitoring costs, synchronization reports, and product-level results as the catalog grows.